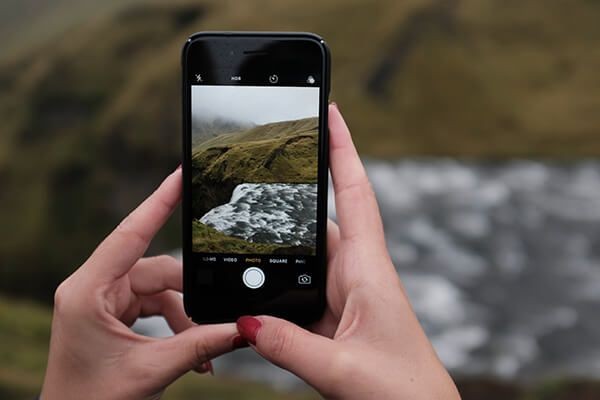
Nearly every social media platform prefers video content over static; with the most authentic and appropriately captured live content, one can deliver exciting, engaging content to the audience.
Live photo combines 1.5 seconds before and after the static image is still shot to get a brief video clip and audio recording to preserve the moment's essence.
It is not a video but a high-efficiency image file format. The dynamic interactive picture and the audio make the memories engaging.
Live photos can be transformed into videos, where you can merge multiple Live photos or add some context to the image to get a story. You can edit, use filters, share the videos in different formats, and share to different devices on multiple platforms.
You do not need multiple screens and different shots; it can simultaneously get you the perfect shot, saving time and storage space.
How to Save Live Photos as Video?
Live photos were a feature in iPhone 6s that captured clips before and after you tapped the shutter button, and such photos could be shared as a static version anywhere or sent as a normal picture.
Live photos work fine when you share via iMessage, Apple devices, iPad or Mac, social media sites Facebook, Twitter, Instagram and even Google. If you want to share the Live Photo for everyone, convert it to a video or animated GIF.
It must be converted to a standard future-proof format available on Windows PCs, Android devices, tablets and Apple devices.
One can share live photos by converting them into videos using third-party apps. The main purpose of saving live photos to video is to allow it to be shared on a platform that does not support the live photo feature.
Most third-party apps do not support live photos; in that case, you can save a file as a video using a video editing program.
How To Save Live Photos as Video Using Apps?
You can use Animoto to convert Live Photos into videos. The app allows slideshow videos where you can create high-quality videos using Live Photos.
You need to use the templates in the app, upload the videos to the online video editor and then customise the video.
You must drag and drop the Live Photo videos into Media blocks, then edit the videos by trimming, adjusting the volume, and adding filters; you can pick colours and fonts and create a story. You can even add a soundtrack of your choice to the video.
Once the video is created, you can click export and download it to your device or share it to your email or social media account.
You must remove unwanted sounds and shaky parts of the video, remove loud noises by trimming the video, and then you can edit the sections of the video to match your personal choice or brand requirement.
If you do not get the Save as video option, you have turned off the live photo feature or enabled effect mode like Loop or Bounce. Live Photos with effects cannot be converted into videos, so you need to save them to normal Live photos to convert them into videos.
To do this, you need to select the Live button from the top left corner (which has options like loop, long exposure and bounce), and the setting can be converted to Live from the drop-down menu. The video clip is saved with the same metadata as the original Live Photo.
You can locate the recently saved video from the albums options – Select recent albums (sorted by date) to change settings.
How Do You Turn Video into Live Photo Without the App?
- To save live photos as videos, you can use an iPhone or iPad, open the Live Photo folder, hit the share icon, and from the List, select Save as Video.
- The Live Photo will be immediately saved as a video. The Photos view, which is the default, does not show new videos. You need to check the new video in the Recent folder.
- Adding a new shortcut, you can quickly save several live photos as videos. Open Shortcuts and click Add in the top right corner.
- Then select Add Action, type "Live Photos," and click "Get Latest Live Photos."
Once the option is added, you can click to modify multiple live photos. - You need to click from the List, where, by default, the latest live photos will be added.
- You can add the Shortcut to the home screen using the iOS shortcut widget, which allows you to locate and save a recent Live Photo into a video.
How To Turn a Live Photo into A Video with Sound?
There are many reasons to save live photos as video – you may want a file format compatible with all user devices or use the file in a video editing program.
Every time a Live photo is taken on the iPhone, the device records the surrounding sounds; when you convert the Live Photo to video, the video has sound, which means the live photo has sound, but it may sometimes not work.
If the sound is not working, check if you added effects like loop, bounce, or Long exposure, silencing the recording.
In 2017, iOS 11 added new tools to Live Photos where you could delete sound, enhance photos, trim videos, crop and rotate images, apply filters, and other editing options allowed for sharing on social media.
How To Turn Video into Live Photo iPhone?
With the Live photo option turned on, one can take a single frame instead of taking multiple copies, and the camera captures lots of frames. One can view pictures and create a moving picture or a short video. Live Photos provide an appealing way of capturing and sharing memories.
To turn video into a live photo, Install the app IntoLive and select the video you want to convert into a Live photo. After that, you can select the Make option to save the video as a live photo on your iPhone. Such options make the live photo sharable.
FlexClip is a free online video editor where you can import videos and photos from your iPhone using a QR code and add animated text filters, stickers and other transitions. You can drag the clips to customise to convert them into other formats.
Lively Converter is a user-friendly mobile app that can convert video into Live photos or Live photos into videos, GIFs and photos. The Lively Converter is available for iPhone and iPad running on iOS 10.0 or later.
Launch the Lively Converter and select the Video option to convert the Live photo. Preview the live video and choose Save as Live Photo.
How To Turn Live Photos into Video Ios 16?
To turn live photos into video, you can use different methods depending on the iOS of your device. The latest version, iOS 16, works on iPhone 14 ( iPhone 6s uses iOS 15).
To save live photos as video, click the Photos app and check if the settings - Loop, Bounce or Long Exposure are not selected. Open the Photos folder, select Album, and Open the Live Photo, where you get the List of Live Photos and can navigate to the main Library.
Select the Live Photo from the gallery and tap on the three-dot More button at the top right, and from the drop-down menu, choose the Share button.
You can select a single live photo or multiple live photos. Select the Share icon and choose Save as Video. Check the Recent folder or the Albums to access the video you saved.
You can save photos as videos using shortcuts – You can use the Shortcuts app to save live photos as videos. Download the third-party app to the settings, locate the Shortcuts and check the Allow Untrusted Shortcuts that gives access to the Shortcuts Gallery website, which converts the Live Photos to video.
You need to open the iPhone Shortcut link and click Get Shortcut. Then, check the Shortcut that will open in the Camera Roll, locate the photo and check the options for converting live photos into video. Save the Live photo as a video at the end of the Camera Roll.
In short - To save live photos as video iOS 16, Launch the Photos app > select the Live Photo you want to share> choose the "Save as Video" option in the share sheet. The video can be saved to the Camera Roll in the Video album.
How To Turn Live Photos into Video 2023?
You can turn live photos into video on an iPhone using the built-in features of the Apple Photos app. You do not need to worry about installing any third-party app to convert the Live Photos into videos.
The tool existed for a long time, and it is compatible with all Apple devices, though it may be a bit different in the older iOS versions.
Click the Photos app on the iPhone and tap on the Albums.
Scroll down to the Media Types and then tap on Live Photos album.
Select the Live Photo you like to convert into a video.
How to save live photos as videos: Select the three dots icon at the top–right corner. You get options "Edit," "Share," and "More." Tap on "Edit" and look for a "Convert to Video" or "Save as Video" option.
Select Save as Video from the pop menu to create a copy of the live photo as a standard video clip. Select the video quality (e.g., 720p or 1080p) and save the video to your gallery.
To save live photos as videos, select "Save As Video." The in-build photos app will instantly convert the Live Photo into a video. Save it in the Video album, or you can use the same method to convert Live Photos into video clips.
How do you convert live photos to video?
To convert, you need to open the Photos app, search for the live photo you want to convert, tap Share, and then 'Save as Video.'
There are limitations to saving live photos as videos on iPhone, so one can use a transfer tool like FoneTool, which transfers the live photos into .jpg or .heic format from the iPhone to the PC and their corresponding video and supporting files are also transferred to the computer automatically.
You can convert multiple files instantly using the app. There is no data loss or degradation of file content in the transfer process; you can easily transfer all the desired files from the iPhone to the computer in seconds, and there is no data loss or degradation of file quality in the transfer process.
Connect the iPhone to a computer with USB, Run FoneTool, and then click Phone Transfer. Then, you need to select iPhone to PC and click Start Transfer. To edit the files, select the Photos icon on the iPhone, pick the Live photos you want to transfer and click OK to confirm.
To save files, you can opt for Transfer Settings and then Start Transfer. Once the files are transferred, access the photos and videos in the local folders while you can edit the videos on the PC using a video editor.
Why Can't I Turn My Live Photo into A Video?
You cannot save live photos as video if the Save as Video option is not available, which may indicate you added live effects to the live photos. You will not get the option to Save as a Video when you use the Live Photo editor to add effects to the photo.
You will have to revert the Live photos to the original versions, save them, and then you will be able to convert them to videos.
How Do You Turn a TikTok into A Live Video?
First, open the TikTok app and create a video. Then click Live from the menu. You can go live on TikTok by live streaming. To start, you must see the preview of the video feed.
Turn the comments on or off and add effects filters, choose a charity to support and share the TikTok Live video on social media and hit Go Live.
Once the video is finished, you can hit the power button on the menu screen, and the Live stream will end. To replay, you can download or change settings from the Settings and Privacy option, or you may Live replay.
You are not allowed to use TikTok Live if you have lost followers and the follower count dropped under 1000; then, you will lose the ability to use TikTok Live.
You may not be allowed to use the feature if you reside in countries that have banned the app, e.g. China, India or Hing Kong, where you cannot create and upload TikTok videos.
If your TikTok app is outdated, you may not be able to use certain features in the newer version. You must check for updates, uninstall the app, turn the phone off and try again. Contact the support team for further updates if you cannot use the feature. You can Report the Problem in the LIVE section to describe the issue.